Apache2
Web Server
A web server is a computer that runs websites. It’s a computer program that distributes web pages as they are requested. A webserver’s primary function is to store, process, and deliver web pages to users. Hypertext Transfer Protocol (HTTP) is used for this communication.
Apache web Server
The Apache HTTP Server, colloquially called Apache, is a free and open-source cross-platform web server software, released under the terms of Apache License 2.0. Apache is developed and maintained by an open community of developers under the auspices of the Apache Software Foundation
Features of Apache Web Server
- Handling of static files
- Load balancing
- Supports HTTP/2
- Compatible with IPv6
- Load balancing
- Gzip compression and decompression
- URL rewriting
- .htaccess
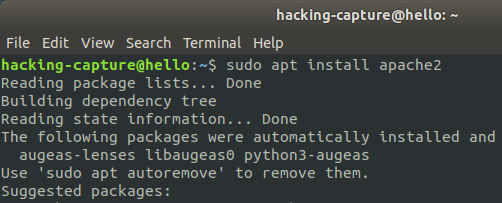
Installation on ubuntu 18.04
sudo apt install apache2

Managing the Apache2 process
Check Apache2 status
sudo systemctl status apache2
To start Apache2 service
sudo systemctl start apache2
To stop Apache2 service
sudo systemctl stop apache2
To stop the service and then restart it
sudo systemctl restart apache2
Enable UFW (Uncomplicated Firewall)
An uncomplicated Firewall is a program for managing a Netfilter firewall designed to be easy to use.UFW is available by default in all Ubuntu installations after 18.04 LTS.
To enable ufw service
sudo ufw enable
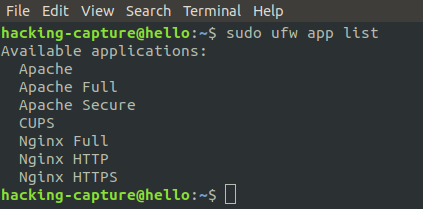
To view which applications have installed a profile.
sudo ufw app list

To allow apache2 Full service.
sudo ufw allow ‘Apache Full’

To check ufw status.
sudo ufw status
Configure multiple domains on a single IP address
Apache Virtual Host allows you to maximize the use of the server’s resources.Multiple domains can be hosted using a single server and IP address.
Set up a Name-base virtual Host
Name-based virtual hosting allows the client to report the hostname to the server, as an element of the HTTP header. This feature means that one machine can host multiple websites sharing the same IP address.
Create a Directory Structure
Each virtual host needs to have a directory for storing virtual host data. Create directories and a directory structure at the following location /var/www. In our example, we’ve created safwan.com and safwan1.com directories, one for each domain name.
sudo mkdir -p /var/www/safwan.com/html/
sudo mkdir -p /var/www/safwan1.com/html/
Create a sample index.html page for each domain, using nano or your favorite text editor. Start with the first domain:
sudo nano /var/www/safwan.com/html/index.html
Add the following sample HTML:
 <html>
 <head>
      <title>Welcome to safwan</title>
 </head>
 <body>
      <h1>Well done! safwan.com is working properly</h1>
 </body>
 <html>
Save and exit the file.
Create a sample page for the second domain.
nano /var/www/safwan1.com/html/index.html
 <html>
 <head>
       <title>Welcome to safwan1!</title>
 </head>
 <body>
       <h1>Well done! Safwan1.com is working properly</h1>
 </body>
 </html>
Save and exit the second HTML file.
To prevent any permission issues modify the ownership of your document’s root directory to www-data. The chown command is useful in this instance:
sudo chown –R www-data:www-data /var/www/safwan.com
sudo chown –R www-data:www-data /var/www/safwan1.com
Note : On Ubuntu the default user for apache2 is www-data.
Virtual Host Configuration File
Apache Virtual Host configuration files are stored in the /etc/apache2/sites-available directory.
To create a basic configuration file for your first domain,
sudo nano /etc/apache2/sites-available/safwan.com.conf
Add the following configuration block to create a basic configuration file. This example uses the first test domain, safwan.com. Make sure to enter the correct domain for your website:
<VirtualHost *:80>

ServerAdmin webmaster@safwan.com
ServerName safwan.com
ServerAlias www.safwan.com
DocumentRoot /var/www/safwan.com/html

ErrorLog ${APACHE_LOG_DIR}/safwan.com-error.log
CustomLog ${APACHE_LOG_DIR}/safwan.com-access.log combined

</VirtualHost>
ServerName – represents the domain
ServerAlias – represents all other domains such as subdomains
DocumentRoot – the directory used by Apache to serve domain files
ErrorLog, CustomLog – designates the log files location
sudo nano /etc/apache2/sites-available/safwan1.com.conf
Add the configuration block as in the example above, making sure to change the values for safwan1.com.
<VirtualHost *:80>

ServerAdmin webmaster@safwan1.com
ServerName safwan1.com
ServerAlias www.safwan1.com
DocumentRoot /var/www/safwan1.com/html

ErrorLog ${APACHE_LOG_DIR}/safwan1.com-error.log
CustomLog ${APACHE_LOG_DIR}/safwan1.com-access.log combined

</VirtualHost>
Enable Virtual Host Configuration Files
To enable the virtual host file, create a symbolic link from the virtual host file to the sites-enabled directory. Apache2 reads this file when staring.
Enable the virtual host file with the command:
Enable the safwan.com
sudo a2ensite safwan.com.conf

Enable the safwan1.com
sudo a2ensite safwan1.com.conf

Using the command, verify the configuration file syntax is correct
sudo apachectl configtest
The message in the terminal will confirm that the syntax is correct: “Syntax OK”
Restart Apache2 to apply the changes
sudo systemctl restart apache2
In the browser, type the domain name

