Nginx
Let Start with Nginx...

Nginx, pronounced like “engine-ex”, is an open-source web server that, since its initial success as a web server, is now also used as a reverse proxy, HTTP cache, and load balancer.
Features of NGINX
Some features of Nginx are as follows:
- Reverse proxy with caching
- IPV6
- Load Balancing
- Web Sockets
- Handling of static files, index files, and auto-indexing
- FastCGI support with caching
- URL rewriting and redirection
Installation in ubuntu
Before the Nginx installation,update the system.
sudo apt update -y
After completing the updating process,install the Nginx
sudo apt-get install nginx
Managing the Nginx Process
Check nginx status
sudo systemctl status nginx
To stop your web server
sudo systemctl stop nginx
To start the web server when it is stopped
sudo systemctl start nginx
To stop and then start the service again
sudo systemctl restart nginx
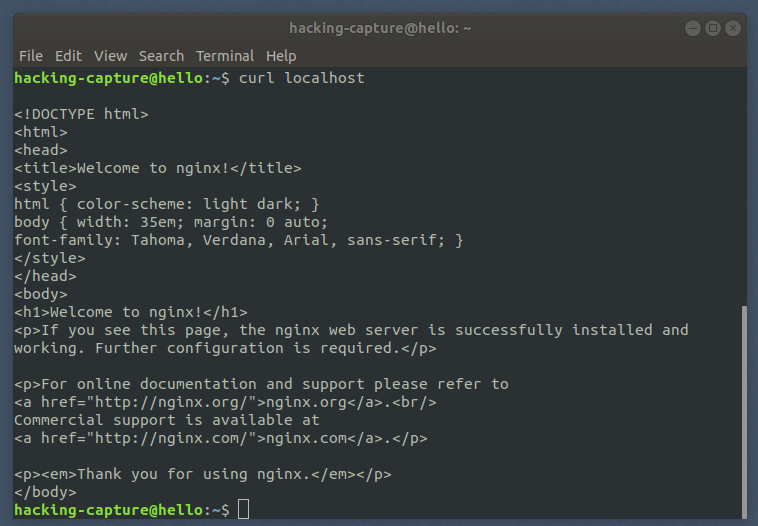
It will show whether nginx is installed and running
Run localhost in curl for looking response Nginx page

Enable UFW (Uncomplicated Firewall)
Uncomplicated Firewall is a program for managing a netfilter firewall designed to be easy to use.UFW is available by default in all Ubuntu installations after 8.04 LTS.
To enable ufw service,type:
sudo ufw enable
To view which applications have installed a profile
sudo ufw app list
To allow Nginx Full service
sudo ufw allow ‘Nginx Full’
To check ufw status
sudo ufw status
Create a Directory Structure
Set up hacking-capture.com as your domain name, but you should replace it with your own. Nginx on Ubuntu 18.04 has one server block enabled by default that is configured to serve documents out of a directory at /var/www/html.
sudo mkdir /var/www/hacking-capture.com/
set owership of directory with www-data
sudo chown -R www-data:www-data /var/www/hacking-capture.com/
set the permission of directory
sudo chmod -R 755 /var/www/hacking-capture.com/
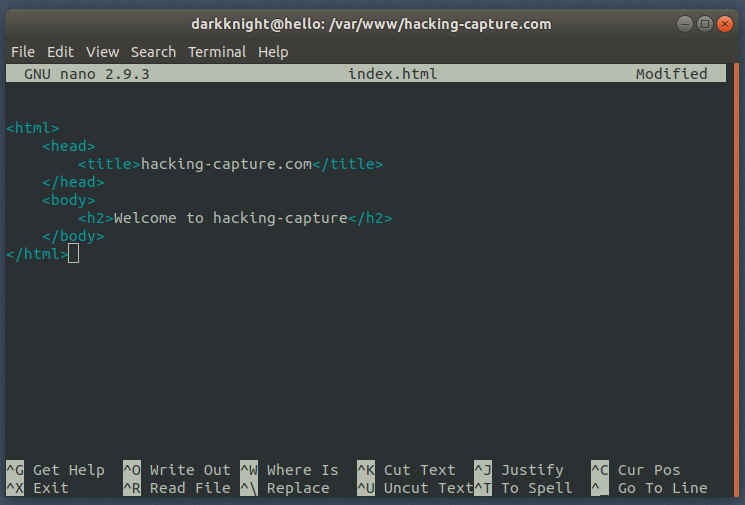
create a html page in /var/www/hacking-capture.com/index.html

save and exit
Setting up server block
nginx server block
In nginx server configuration block, which is similar to the default, but updated for our new directory and domain name:
sudo nano /etc/nginx/sites-available/hacking-capture.com
server {
        listen 80;
        listen [::]:80;

        root /var/www/hacking-capture.com/;
        index index.html;

        server_name hacking-capture.com www.hacking-capture.com;

        location / {
                try_files $uri $uri/ =404;
        }
}
Enable the server block
Enable the file by creating a link from it to the sites-enabled directory, which Nginx reads from during startup:
sudo ln -s /etc/nginx/sites-available/hacking-capture.com /etc/nginx/sites-enabled/
To avoid a possible hash bucket memory problem that can arise from adding additional server names, it is necessary to adjust a single value in the /etc/nginx/nginx.conf file.
sudo nano /etc/nginx/nginx.conf
Find the server_names_hash_bucket_size directive and remove the # symbol to uncomment the line
...
http {
    ...
    server_names_hash_bucket_size 64;
    ...
}
...
test the nginx syntax error in any nginx files
nginx -t
Then, reload the nginx
sudo systemctl reload nginx